Instructions for installing the CapMonster Cloud extension in the ProjectMaker browser
The extension only works with the Chromium browser!
Method #1: Installation using a CRX file.
- Download CRX file CapMonster Cloud;
Here you can find instructions for installing the CRX file.
-
Open ProjectMaker;
-
Add the Add extension action;
- Specify the path to the CRX file in the action settings;
-
Add the Activate extension action;
-
In the action settings, set the extension ID pabjfbciaedomjjfelfafejkppknjleh;
-
In the extension window that opens, enter the API-key from your CapMonster Cloud personal account.
Method #2: Installation via the Chrome Web Store.
-
Open ProjectMaker;
-
Go to the extension page
<https://chrome.google.com/webstore/detail/capmonster-cloud-%E2%80%94-automa/pabjfbciaedomjjfelfafejkppknjleh?hl=en>; -
Click the Install button and install the extension;
-
Add Activate extension action;
- In the action settings, insert the extension ID pabjfbciaedomjjfelfafejkppknjleh;
-
In the extension window that opens, enter the API-key from your CapMonster Cloud personal account.
The new version of the CapMonster Cloud extension has the ability to solve reCAPTCHA2, reCAPTCHA Enterprise by clicks.
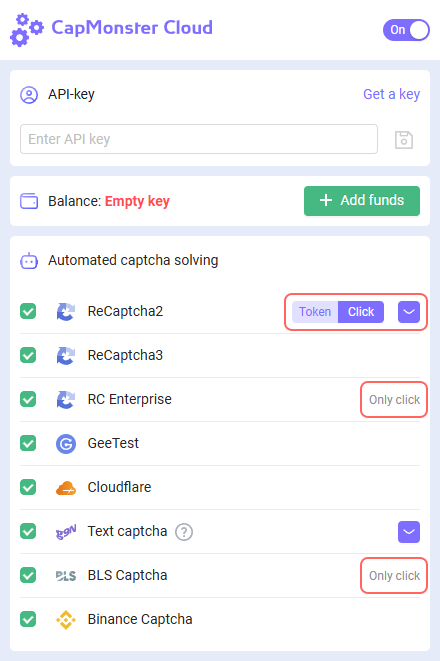
Please note that when installing the extension the solving type for reCAPTCHA2, reCAPTCHA Enterprise is set Click by default.
To make the use of CapMonster Cloud extension in the ProjectMaker easier, we’ve prepared a project to automate the installation of the extension, entering the API-key and choosing the solving type reCAPTCHA2, reCAPTCHA Enterprise.
Minimum version of ZennoPoster 7.6.1

When installing the CapMonster Cloud extension via a CRX file, you need to keep the extension version up to date. In case of a version update, you need to re-download the current CRX file and reinstall it.
When using the CapMonster Cloud extension, you need to remove captcha recognition actions from your project.